Monday, 15 July 2013

Roman Solider Amigurumi For Oxjam

We were asked to make the mascot for the Colchester Oxjam music festival, obviously I was more than happy to donate a custom amigurumi to them.
They wanted the mascot to be something that was connected with Colchester and decided on a Roman solider.
Colchester was the first capital of Roman Britain for our readers who don't know.


I used my basic human pattern, the helmet was the hardest part, I was worried I wouldn't be able to make the fluffy piece on top stick up but it all turned out fine; trial and error being my best friend here.


We're looking forward to the main Oxjam event in October, Mr. Pea and I love live music and it's all for a very good cause too!


Monday, 17 June 2013

How to Make a Cushion From a T-shirt

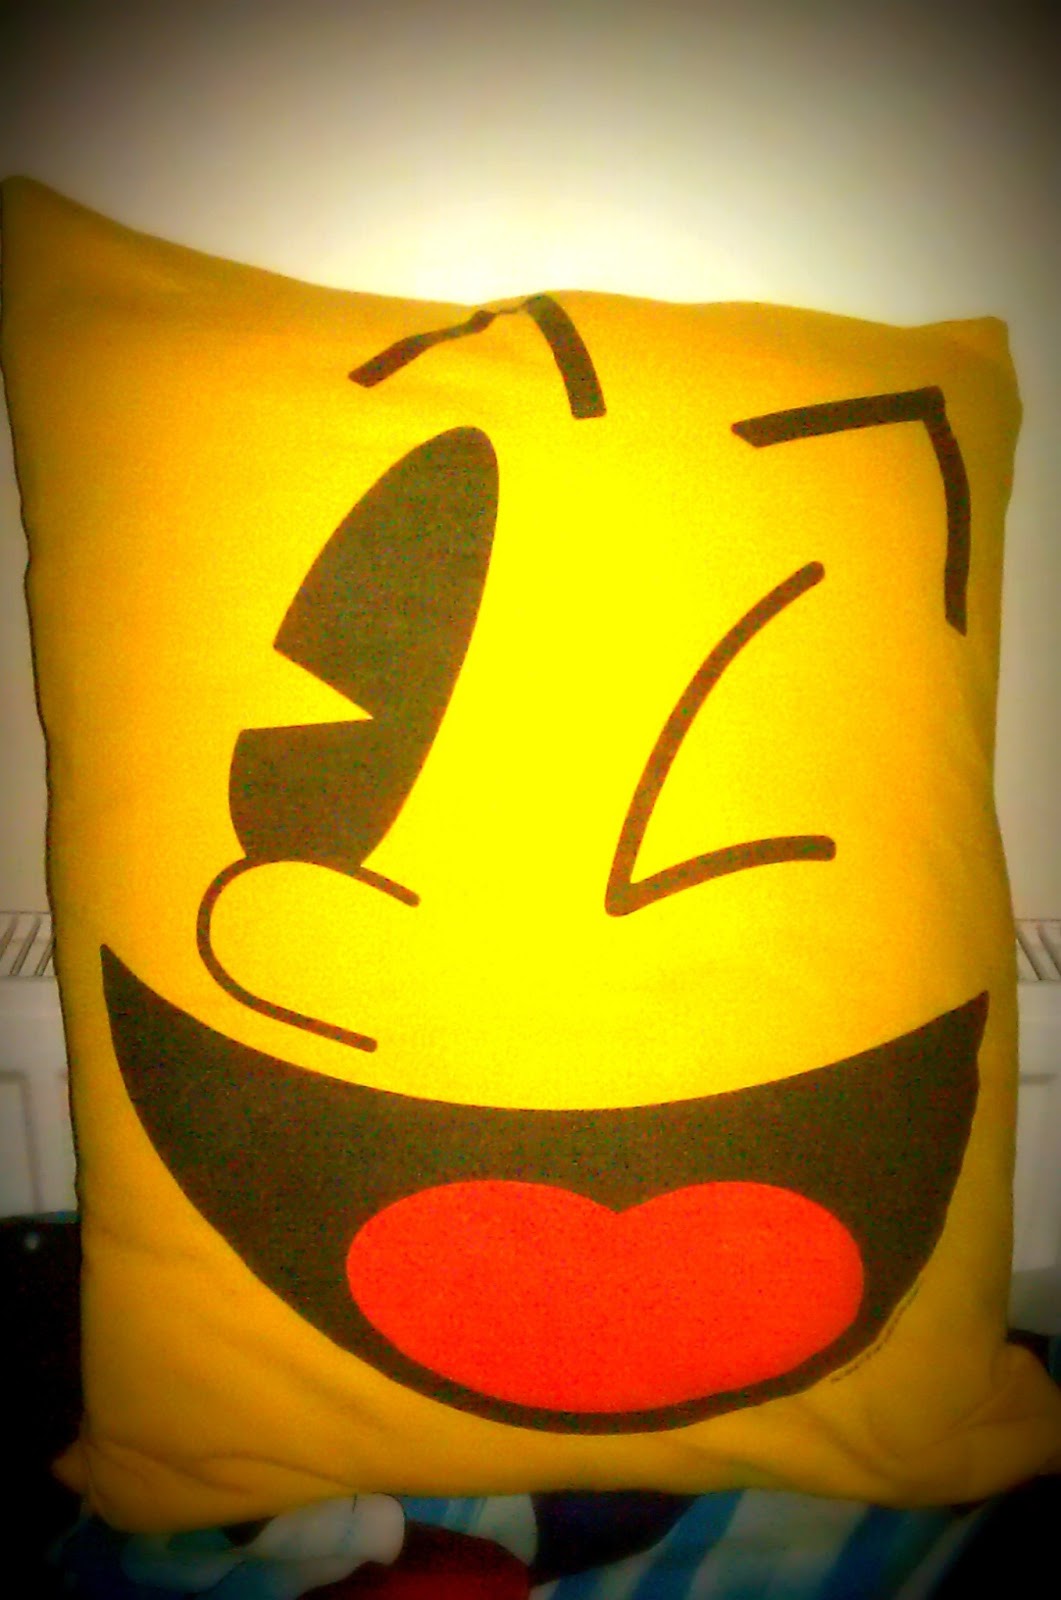
Mr. Pea was clearing out some T-shirts so I nabbed one to make a cushion for him. There is probably a neater way to do this than my method, but it only took about half an hour and all the un-neatness is hidden on the inside!

You will need the following:
  • T-shirt
  • Sewing machine
  • Ruler
  • Fabric pen
  • Needle and cotton.

First pick your tee; I took this Pac-man one from Lee's pile of stuff for charity.


Turn the T-shirt inside out, make sure it is perfectly lined up so the seam at the top of the shoulders is at the top and not coming forward or back, you can pin it in place so it doesn't move when you put it in the sewing machine.
I marked on mine where the top of the pattern is so I could get the whole thing in, I used a ruler and a fabric pen to draw a line from the mark to the middle of the sleeves, just below the neck hole. This is the line which you sew down with the sewing machine, make double sure the t-shirt is inside out, I nearly sewed mine wrong as I kept checking the location of my line by turning it back the right way.
Once you have sewed down the line it will look like this:


That's the top all sewed up, so now to do the same to the sides. Decide how wide you want the pillow to be and draw a line again going down from the top line to the bottom of the Tee, do the same on both sides and machine those in. Now the only hole left is the bottom, I sewed about a couple of inches away  from the bottom so my cushion wasn't too long, just machine where the size feels good, to close the gap I only sewed half way across, as a cushion filler has to get in there.
Once the 4 edges have been sewn along, lay the T-shirt flat out on a table or floor and cut the excess fabric away.


Once all the excess has gone it can be turned inside out and stuffed with a cushion inner, polyester filling, or bean bag beans! Don't forget to stitch up the gap at the bottom, I used blanket stitch, another type of stitch would be more appropriate but my needle skills are limited.
Et voila, finished cushion 


I couldn't find a cushion inner which fitted it very well so it's a bit wonky at the top but Mr. Pea doesn't mind.


Sunday, 16 June 2013

Majora's Mask Shrink Plastic Key ring

Long time no see! I've been making, making and making this last couple of weeks. Mr. Pea's birthday pressie, plus a couple of customs to complete, has left me with zero blogging time!
I do however have time to share the Majora's Mask key ring I made for Mr. Pea. He loves The Legend Of Zelda and had sadly lost his wooden Majora's Mask key ring his brother got him from Etsy, so this seemed the perfect choice for a first shrink plastic project.

I bought a couple of packets of Shrinkles shrink plastic from The Range, one frosted and one clear. I decided to go with the frosted for this one. I drew Majora's Mask on it in pencil first and then went over it in Sharpie, the next time I use this I am going to use Sharpies from the beginning as I found it hard to rub the pencil marks off once I had gone over them, and the pencil marks also show through the light pens.

Finished Majora's Mask on the shrink plastic

I cut it out right up to the black outline, I've seen people make things from shrink plastic and leave a white border around the edge, I guess this would be useful for complicated pictures but this is quite a basic shape, even if it is a bit pointy.
Once he was cut out I punched a hole in the corner using a hole punch, the hole isn't as big and garish once it's all shrunk down.

All cut out and hole punched ready for the oven

Next the fun part, popping it in the oven! I stuck it on a foil lined baking tray as per the instructions, as there is no light in my oven I had to shine a torch in there to watch it curl up and eventually flatten, which means time to take it out. The hardest part was getting it out of the oven, picking it up and putting a book on it to flatten it before it goes hard, which happens pretty quickly. The foil is obviously super hot, so I used oven mitts but they were fairly clumsy... I think next time I'll use baking paper, I'm sure it'll work as well as foil minus the heat.

Finished!

There it is all finished and shrunk. The Sharpies darken quite a bit once shrunk, it looks very dark if it's not held up against the light. Next time I'll try either colouring pencils or lighter Sharpies from our increasingly epic collection! Overall I'm quite pleased with my first attempt at shrink plastic and so is Mr. Pea :)

Tuesday, 21 May 2013

Mr. Pea's Surprise Okami Amigurumi

Mr. Pea has been very spoilt, he has had an amigurumi before his birthday! I just couldn't wait to give it to him.
He has been playing Okami on his PS3 and mentioned a desire for an Amaterasu plush or amigurumi, so I planned for a while and then got to work.

I decided to make him a mini one and to mostly base it on Chibiterasu (Amaterasu's son from sequel, Okamiden) I have yet to play this game so haven't seen him in action, it was free on Playstation plus and waiting for me to start but Mr. Pea seems quite happy that I have got it right, win!


Saturday, 4 May 2013

Some Time On My Hands

I have actual free time now! The squirrels are all done and for sale on the All Round website, I have finished one of the orders I received, a fisherman amigurumi, and the other isn't due until July.

Amigurumi Fisherman Done!

It's Lee's birthday in a few weeks, just 5 days after mine! I now have some time to concentrate on making him something as tradition dictates, last year I made him a Pokeball dress wearing amigurumi of myself...as you do.


I have a couple of ideas for him this year, which I clearly can't reveal as Mr. Pea is the other half of Crafty Geeks and most definitely reads our blog! 
I may have some time to carry on with my Duke Nukem cross stitch too! Remember him?
http://craftygeeksblog.blogspot.co.uk/2012/10/size-only-matters-when-youre-full-grown.html


Monday, 22 April 2013

No rest for the wicked

Phew! Squirrels are finished and on their merry way to all round clothing HQ, I had only just put my crochet needle back in it's little case when I got 2 orders for custom amigurumi!

I've been playing Super Mario 3D Land for the last couple of weeks inbetween crocheting, I want to make everything in it! Mario in his little tanooki suit is super cute so I'm adding that to my list, I especially like the white suit which you get when you die too much, I got to rock that little suit a lot, I suck.


I promised Lee I would make him an Amaterasu from Okami too, I'm going to make the small cute version, which is what amigurumi is all about, not because it's quicker hehe! 

That little lot should keep me going for a while!

Sunday, 7 April 2013

Non Geek Chic

Inbetween Squirrel making I knocked up a doily for my mum, she kept hinting she wanted one for her kitchen table, the biggest and last hint was when she purchased a ball of orange cotton yarn.
Despite the fact that my mother taught me to crochet she doesn't do any herself, therefore if she wants something made she waits for me to it for her.

Cute doily!

 I do like this doily, I wish she wanted one with a few colours in though as plain orange was a bit boring to make,  thankfully making one is super quick though so I didn't have to stare at it for too long.
I got the pattern from Simply Crochet magazine, it's supposed to have another couple of rows added onto it but I decided it was about the right size like this and the petals look sweet sticking out of the bottom of the fruit bowl!


Looks like a flower under the bowl!

Related Posts Plugin for WordPress, Blogger...